Whether you’re a new player, a youth coach, or a curious fan, understanding handball court markings is essential for following and enjoying the game. Every line and zone on the playing surface has a clear purpose, from safety to tactics. In this guide, we’ll walk through all key handball court lines, zones, and their meanings so you can confidently read any handball court like a pro.
Introduction: Why Handball Court Markings Matter
A standard handball court might look a bit confusing at first glance: colored arcs, rectangles, dashed lines, solid lines, and a lot of geometry. But once you understand what each marking represents, the game becomes much easier to follow.
Handball is a fast-paced invasion sport where precision matters. Players must know:
- Where they are allowed to step
- Which zones they can enter
- Where free throws and penalties are taken from
- How far defenders must stay from the shooter
This article explains all important handball court markings, using the official IHF (International Handball Federation) rules as a reference, so you get a clear and accurate understanding of the court layout.
Standard Handball Court Dimensions at a Glance
Before diving into specific lines and zones, it helps to know the basic size of a standard indoor handball court.
| Feature | Measurement (Senior Level) |
|---|---|
| Court length | 40 m |
| Court width | 20 m |
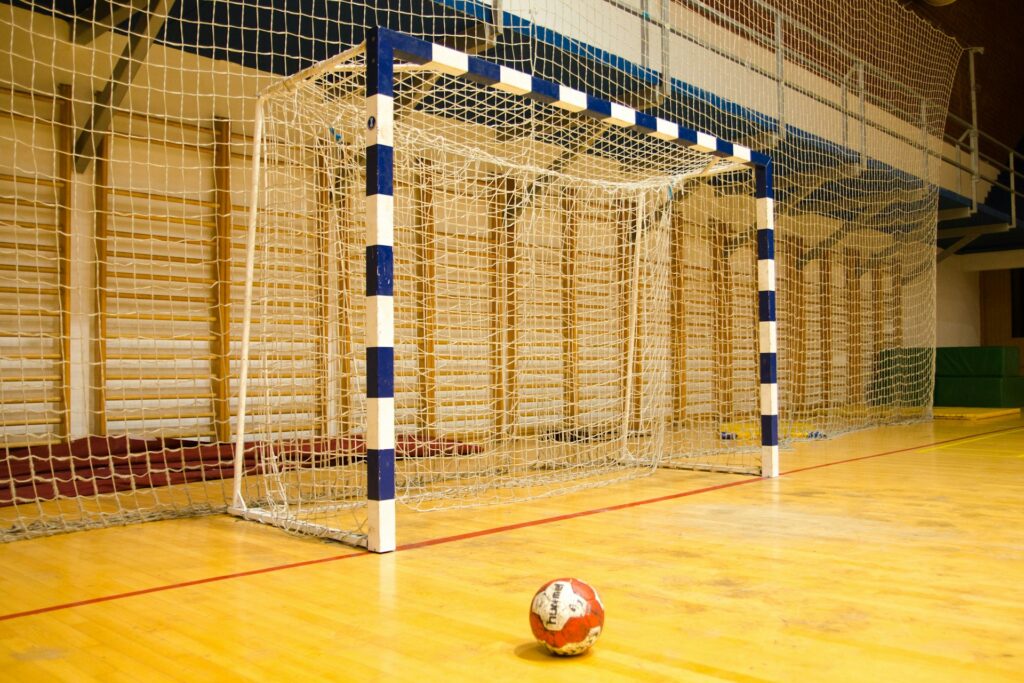
| Goal width | 3 m |
| Goal height | 2 m |
| Goal area line | 6 m from goal |
| Free-throw line | 9 m from goal (dashed) |
| 7-meter line | 7 m from goal |
These are the standard international dimensions. Youth competitions sometimes use smaller courts, but the court markings and zones remain essentially the same, just scaled down.
Main Layout: Basic Handball Court Lines
1. Sidelines and Goal Lines (End Lines)
The outer boundary of the handball court consists of:
- Sidelines: The two long lines (40 m) along each side of the court.
- Goal lines (end lines): The two short lines (20 m) behind each goal.
The ball is considered out of play when it fully crosses a sideline or goal line. Teams must execute throw-ins and goalkeeper throws from behind or on these lines, depending on the situation.
2. Center Line
The center line divides the court into two equal halves. It is used for:
- Throw-off at the start of the game
- Throw-off after a goal
The player taking the throw-off must have one foot on or near the center line when starting the pass, and all other players must be in their own half until the whistle is blown.
Goal Area: The Famous 6-Meter Line
3. The 6-Meter Goal Area Line
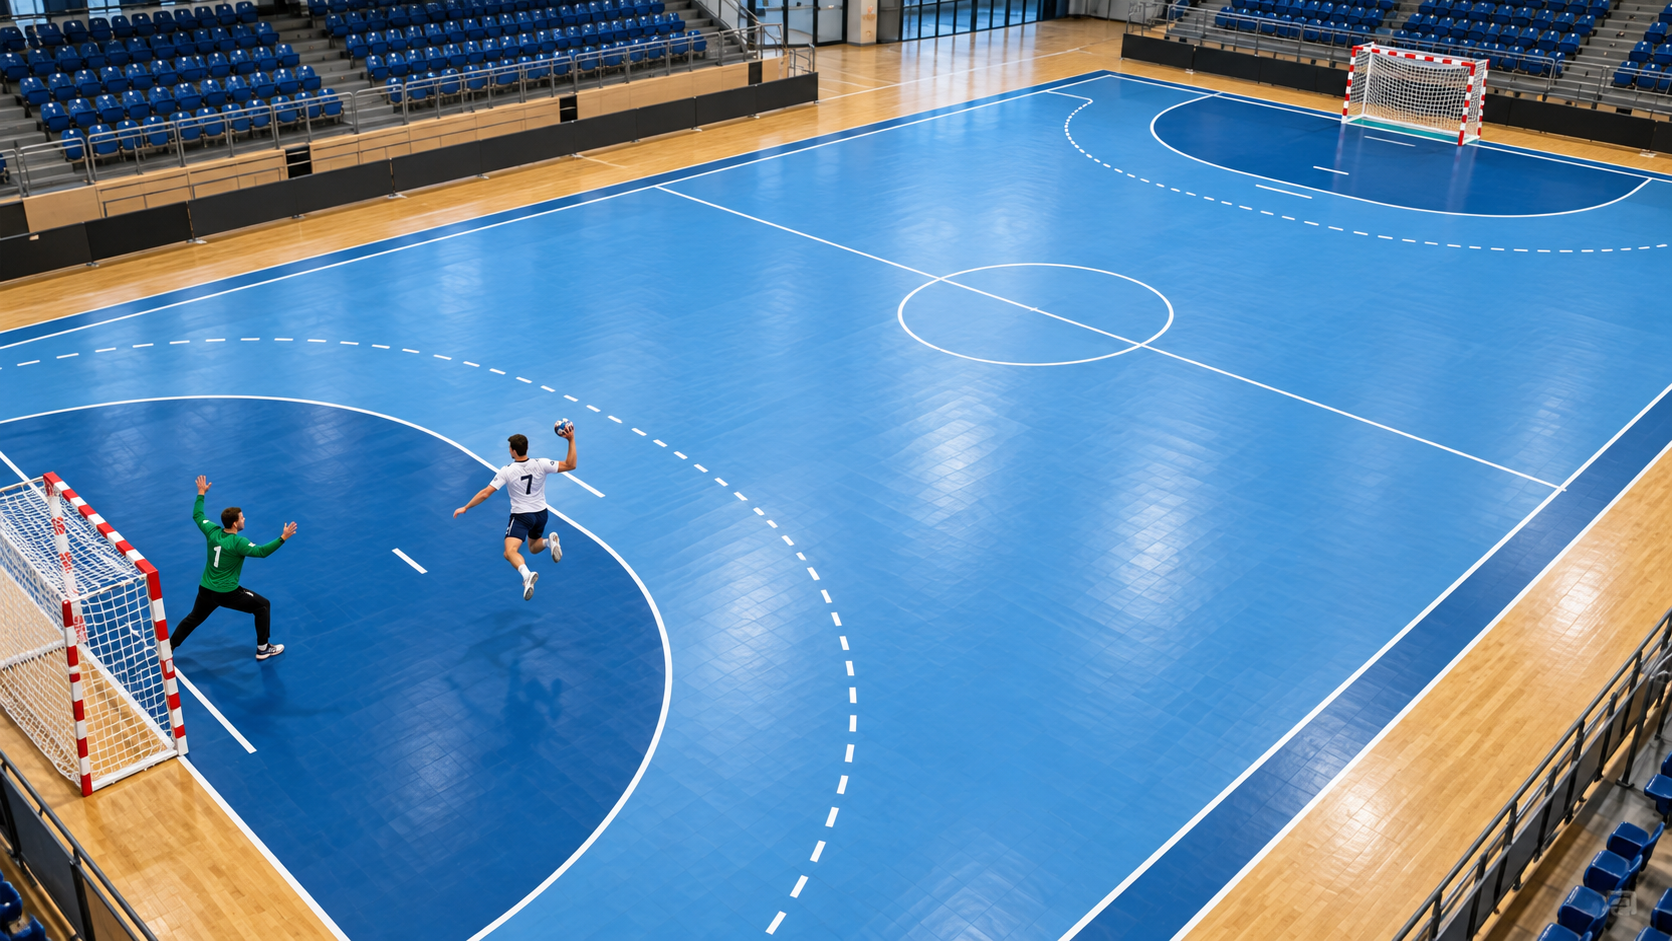
One of the most important handball court markings is the 6-meter goal area line, also called the goal crease or simply the 6m line.
The goal area is defined by:
- A 6 m radius from the inside of each goalpost
- Curved arcs connected by straight lines, together forming the goal area line
Key rule: Only the goalkeeper is allowed inside the goal area while touching the ground. Field players cannot stand or run inside it. They can, however, jump from outside, shoot in the air, and land inside the area after releasing the ball.
Stepping into the goal area incorrectly can lead to:
- A free throw for the opponents
- A turnover if the attacker gains an advantage
4. Goal Area (Keeper’s Domain)
The area inside the 6-meter line is the goalkeeper’s territory. Here, the keeper has some special privileges:
- Can touch the ball with any part of the body
- Can move freely within the area
- Cannot take the ball back into the goal area from outside if in full control
Understanding the goal area rules is crucial for both attackers and defenders because many critical actions-shots, penalties, blocks-happen very close to this zone.
The 9-Meter Free-Throw Line
5. The Dashed Free-Throw Line
The 9-meter line is a dashed arc drawn around each goal, 9 meters from the goal line. It is also known as the free-throw line.
This line is used for:
- Free throws awarded against defending teams for fouls or rule violations outside the 6 m area
- Marking the distance defenders must respect during a free throw
When a free throw is taken:
- Attackers must stand outside the free-throw line.
- Defenders must be at least 3 meters away from the thrower.
This spacing creates room for tactical set plays, passing combinations, and long-range shots, making the 9-meter zone a key strategic area.
The 7-Meter Line: Penalty Throw Marking
6. The 7-Meter Throw Line
The 7-meter line is a short line placed directly in front of the goal, exactly 7 meters from the goal line. It marks the spot from which penalty throws are taken.
A 7-meter throw is awarded when:
- A clear scoring opportunity is illegally stopped by a defender
- Certain serious violations occur inside or near the goal area
On a 7-meter throw:
- The shooter must stand behind the 7-meter line.
- The goalkeeper must remain on or in front of the goal line until the ball leaves the shooter’s hand.
- All other players must stand outside the 9-meter line.
The 7-meter line is often the most high-pressure spot on the court, similar to a penalty kick in football (soccer).
The 4-Meter Goalkeeper Line
7. The 4-Meter Line (Goalkeeper Restraining Line)
In front of each goal, there is a small line drawn 4 meters in front of the goal line, centered on the goal. This is the goalkeeper’s restraining line.
It mainly affects 7-meter throws:
- The goalkeeper may advance up to this line during a penalty throw.
- The keeper cannot step beyond the 4-meter line until the shooter releases the ball.
This line balances the duel between shooter and goalkeeper, preventing keepers from rushing too far out and shrinking the angle unfairly.
Substitution Area and Technical Zone Markings
8. Substitution Line and Team Benches
Along one sideline, you’ll see markings that define the substitution area and technical zones for the teams.
Key elements:
- Substitution line: Usually a short line (about 4.5 m long) starting from the center line and extending into the court on each side. This shows where players must enter and leave the court.
- Team benches: Placed outside the court along the sideline, close to each team’s substitution area.
Players must switch only through their team’s substitution line. Entering or leaving the court incorrectly can result in a 2-minute suspension or a free throw for the opposing team.
9. Technical Area
The technical area, often marked by subtle lines or simply designated space, is where coaches and officials sit. Only certain team officials are allowed to stand and give instructions, and must stay within this zone.
Colors and Visibility of Handball Court Lines
To keep the game clear and fair, handball court lines must be:
- Clearly visible and in strong contrast to the floor color.
- Consistently colored for all markings of the handball court (often white or yellow).
In multi-sport halls, different sports use different line colors. For example:
| Sport | Typical Line Color |
|---|---|
| Handball | White or yellow |
| Basketball | Black or dark |
| Volleyball | Red |
| Futsal | Blue |
This avoids confusion when multiple sports are played in the same venue.
Tactical Importance of Handball Court Zones
Understanding the rules is one thing-but knowing how court zones influence tactics will help you appreciate real match strategies.
Attacking Tactics by Zone
- 6-9 meter zone:
- Main area for outside shots and backcourt players.
- Wings near the goal line:
- Used for fast breaks and sharp-angle shots.
- Wingers time jumps to release the ball before landing inside the 6m area.
- 7-meter line:
- Specialist penalty shooters often have unique techniques and routines.
Defensive Tactics by Zone
- 6-meter line:
- Defenders position themselves right outside this line to block shots and passes.
- Stepping into the goal area accidentally can easily open space for attackers.
- 9-meter line:
- Teams may defend more aggressively outside this line to avoid free throws near dangerous shooting positions.
Quick Reference: Key Handball Court Markings
| Marking | Distance | Main Purpose |
|---|---|---|
| Sidelines | 40 m length | Outer boundary of the court |
| Goal lines | 20 m width | Ends of the court, behind goals |
| Center line | Across width | Throw-offs and half division |
| 6 m line | 6 m from goal | Goal area limit (keeper only) |
| 9 m line | 9 m from goal | Free-throw line (dashed) |
| 7 m line | 7 m from goal | Penalty throw spot |
| 4 m line | 4 m from goal | Goalkeeper limit on penalties |
| Substitution line | ~4.5 m from center | Entry and exit for players |
Practical Tips for Players and Coaches
For New Players
- Memorize the “no-go” zone: The goal area (inside 6m) is off-limits while touching the floor, unless you’re the goalkeeper.
- Practice your jump shots: Learn to take off outside the 6m line and release the ball before landing in the goal area.
- Respect the 3-meter distance: During free throws, keep enough space to avoid unnecessary fouls or penalties.
For Coaches
- Use cones and tape in training: Reinforce the 6m, 9m, and 7m markings even if your hall is multi-purpose.
- Run zone-awareness drills: Stop play and ask players where they are in relation to the 6m and 9m lines to build spatial awareness.
- Design set plays by zone: For example, one play for 9m free throws, another for wing attacks from the corner near the goal line.
Common Mistakes Related to Court Markings
- Stepping on the 6m line when shooting: If an attacker lands on or inside the goal area before releasing the ball, the goal can be disallowed.
- Incorrect substitutions: Entering the court too early or outside the substitution line can lead to a 2-minute suspension.
- Defending too close on free throws: Not respecting the 3-meter distance from the thrower can result in repeated fouls and sanctions.
- Goalkeeper leaving the area incorrectly: Handling the ball outside the goal area like a field player is allowed, but bringing a controlled ball back into the area is a violation.
Benefits of Understanding Handball Court Markings
Taking time to study handball court markings offers several advantages:
- Faster decision-making: Players instantly know where they can move, shoot, or defend.
- Fewer penalties and turnovers: Avoiding basic infractions helps teams maintain momentum.
- Better tactical execution: Coaches can build clearer game plans around zones like the 6-9 meter area and the 7m line.
- Improved viewing experience: Spectators and parents can better understand referee decisions and match dynamics.
Conclusion: Reading the Handball Court Like a Pro
The next time you walk into a gym and see a handball court, take a moment to spot the 6-meter line, the 9-meter dashed arc, and the 7-meter penalty mark. These key handball court lines and zones shape almost every action on the court-from spectacular jump shots to high-stakes penalty throws.
By understanding what each marking means, you will:
- Play more confidently and intelligently
- Coach with clearer strategies and communication
- Enjoy watching handball at a deeper, more tactical level
Handball is a dynamic, exciting sport, and the court itself is your roadmap. Master the lines and zones, and you’ll be one step closer to mastering the game.